An Irish Blessing!

As you probably know, Boston is home to people of many nationalities and cultures. But as an old Irishman once said, “On St. Paddy’s Day there are two kinds of people: the Irish and those that wish they were!”

Perhaps not the most “politically correct” statement to be made, but in the spirit of celebration- everyone can enjoy a good time, regardless of your ethnicity or beliefs.

If you live in Suffolk County, March 17 is also a legal holiday- Evacuation Day, marking the day in 1776 when the British left Boston Harbor during the Revolutionary War.

The big South Boston parade (which I have never attended) was on the 16th, but the St. Patrick’s celebrating apparently started early on the week-end.!  We had tickets for the Boston Ballet performance of Cinderella (which was awesome, btw) on Saturday night so decided to have dinner at Quincy Market before the show. Already,there were many revelers dressed in all shades of green gathering in groups or standing in lines to enter the various restaurants and bars. Lots of spirit and fun was evident, and the evening had not yet begun!

A few hours later, on our train ride home we seemed to be in the “party car” with some “celebrants” singing and attempting to dance ??? at 60mph???  They were enjoying themselves!

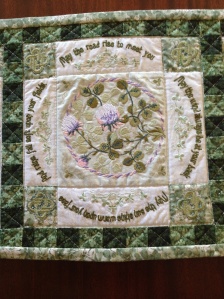
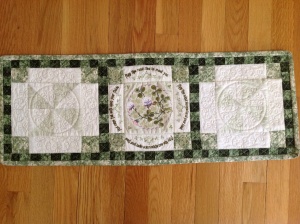
Now, onto other things!  How about this table runner made from San Francisco Stitch  Company?  Irish table runnerThis was such a fun project and I’m thrilled with how it turned out.  All of the embroidery and quilting is done “in the hoop” by machine.Irish Runner

I think this table runner will be lingering on my table for a while longer, too.Irish Blessing

Presidio Purse Revisited


Hi Everyone! The weather here is finally warm enough to consider taking pictures outside and showing off what I have been working on- my adaptation of the Presidio Purse!

In case you missed it, Seamstress Erin has just finished a sew along of her latest pattern, the Presidio Purse.The bag is very generous in size and not difficult to construct, but after making my first one, I really wanted something that was more on a smaller scale for everyday use. So… I set to work…

The first thing I did was to measure and compare the sizes of bags I already have. That “research” revealed that most bags I have were an average of 1 3/4 inches shorter than the Presidio Purse. Not really that much of a difference, but I still felt that the size was not right for me.

With that information, I started to modify the pattern by overlapping the bottom portion of the pattern by that 1 3/4 inches. Then I made some adjustments to the combined side/bottom piece and created a muslin. I knew right away that this was not the “look” I was going for, either. There was still something that was “too big” but progress was being made!

Then I decided maybe I could eliminate the side/bottom piece altogether and create depth to the purse by adding darts! Ding ding ding…We have a winner!

Here you can see the pattern changes in order:

Overlap the bottom portion of the front/back pierce 1 3/4″ and shorten the bottom portion of the zipper pocket piece by the same amount. (I just folded it under). The darts are 1″ long with a total take-up for each dart at 1 1/2″.


On the front & backI used a woven fusible interfacing and also on the following lining pieces:

  • 1 lower zipper pocket piece
  • 2 handles
  • 2 handle anchors
  • small pocket piece*

* I cut the small pocket on the fold, interfaced half of it and sewed it right sides together, leaving an opening to turn right sides out. (No raw edges ).


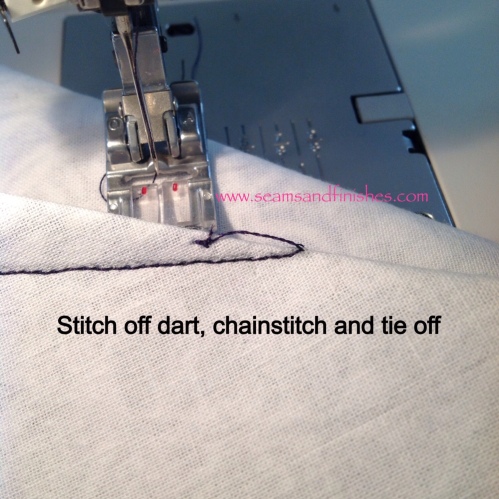
A close-up of sewing the darts: To eliminate the dimple at the point of a dart, stitch off the point and continue stitching a thread chain. Lift your presser foot an re-position the needle within the dart fold and tie-off.

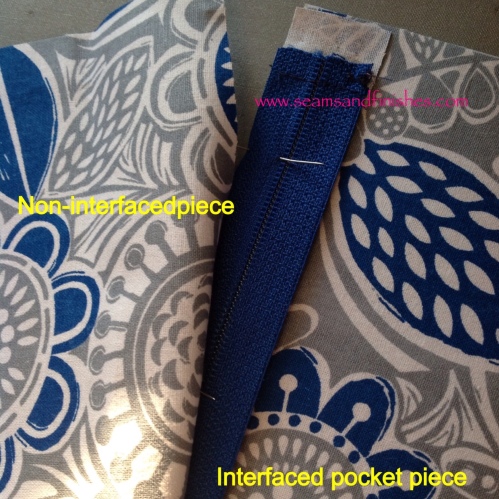
Sandwich the zipper between the 2 lower large pocket pieces, having the one with the interfacing on the bottom. Repeat with the remaining top pocket pieces and neither of these pieces is interfaced. (This is the same technique used for inserting the main zipper in the Presidio Purse.)


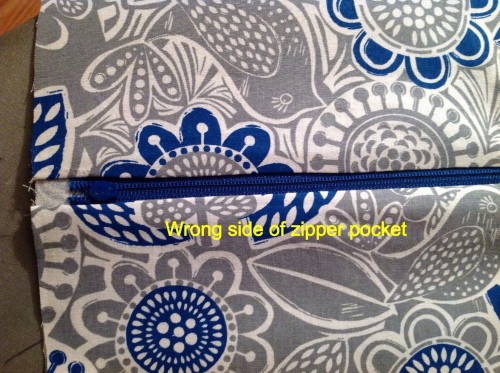
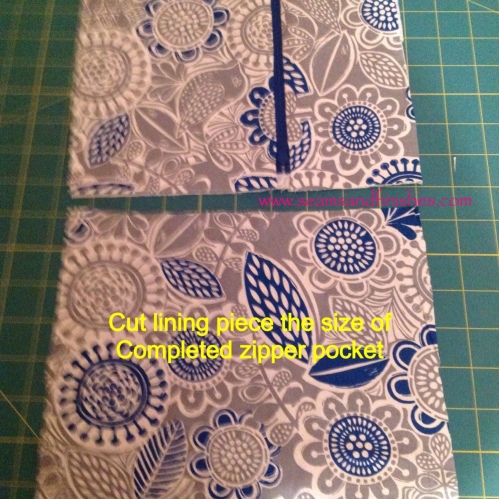
Cut pocket lining the same size as completed zipper pocket.


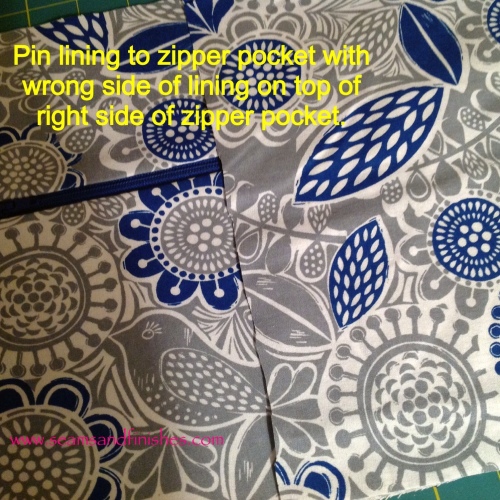
Place WRONG side of this piece on top the right side of the zipper pocket. Stitch together with 1/4″ seam on 3 sides, leaving top open. Trim corners & turn to right side & press. When this pocket assembly is stitched to the lining with 1/4″ seam, there will be no raw edges inside, and the right side of the lining is visible when you unzip the pocket!

Small pocket stitched to lining (reinforced with bar tacks).
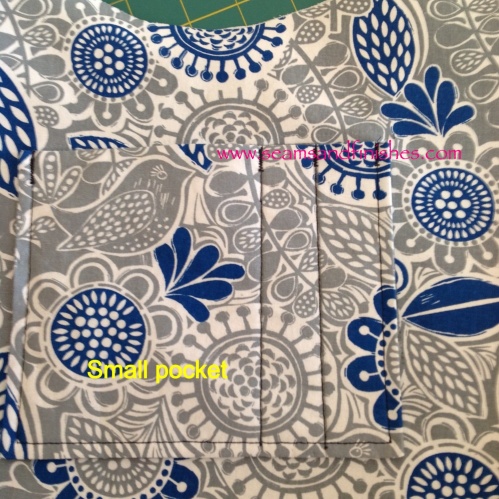
 

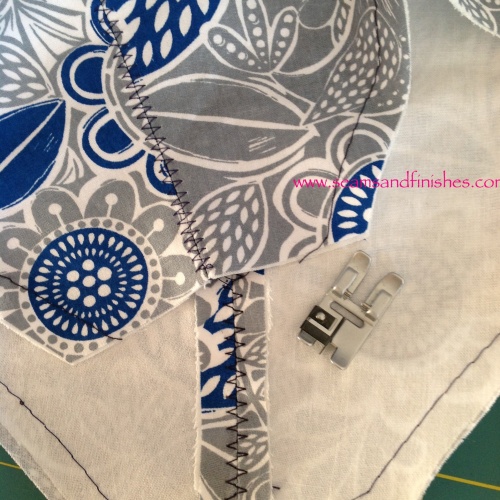
Once the pockets were stitched to the front & back lining pieces, it was time to stitch the front & back together. After doing this, I pressed the seams open and used a 2-step zig-zag stitch along the seam to keep it open.

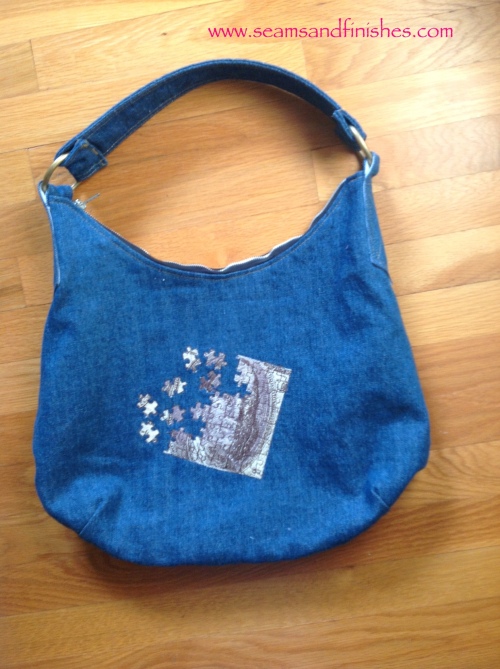
Now, onto the bag, itself! I was able to find some 10 oz. wt denim at Joann's and that was perfect, because I wanted to make this bag very casual and do some machine embroidery on the front! (I'll get to that, shortly!)

Embroidery done and bag assembled, here are a few details:

  • Top stitched the seam using a 6.0/100 needle with regular thread. I have not had a great deal of luck using top-stitching thread in the past. If you like more definition, you can thread the needles with two of the same weight thread to get a slightly thicker appearance or use 2 different colors in the same needle for an even different look!
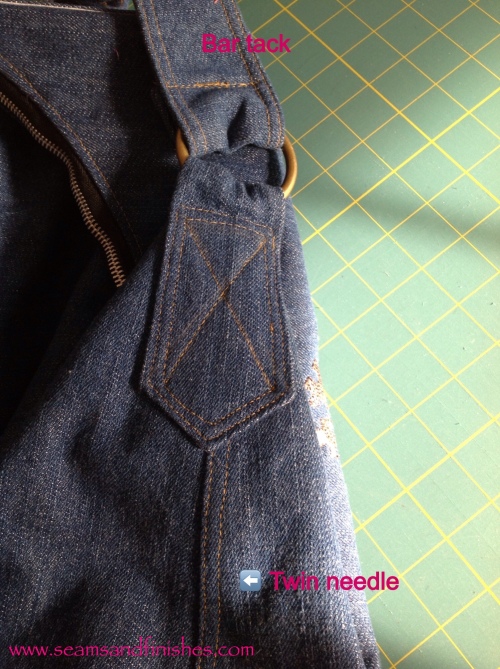
  • For top stitching handle & anchors and construction, a jeans/denim size 100 needle was used.
  • Bar tacks were added on the handle after I attached it to the ring for extra security, and it goes along with a jeans style!
  • The 2″ rings were ordered from Pacific Trimming.


Here is the finished bag!

The design is from “Worth Every Penny”, a collection found here.

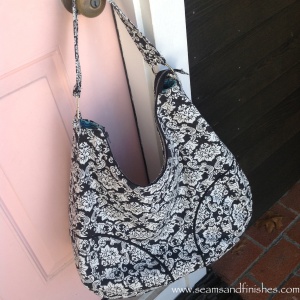
And here is the bag in action!
 

Presidio Purse Pattern

Seamstress Erin has just released her first pattern, The Presidio Purse! In fact, she is currently hosting a sew-along, so you still have the opportunity to join her in making one of your own!

Presidio Purse

Early last month Erin selected a group of volunteers to test this pattern. With a 2-week deadline and the holiday rush, I quickly got to work. The pattern is downloadable for either a copy shop or home version. I printed it at home and was done in no time.

Next stop: The Large Fabric Store Chain.

Now, the original description given was that this purse could be carry-on luggage size, and the recommended interfacing would be firm. I chose to interface my lining with a fusible that is recommended for handbags. Although it worked-out fine, it was not easy to sew and difficult to maneuver under the machine. I had to wrestle with it, like working with a life vest! Check-out Erin’s discussion here outlining fabric selection choices.

Presidio Purse

The directions and illustrations for making this purse are well thought out. I did make a couple of changes to the pockets by interfacing them for sturdiness & functionality and lining them so there are no raw edges, but these are my personal preferences.

Presidio Purse interior

For the hardware I used a 2″ D-ring which was not rectangular and I’m very pleased. One thing I really like about this purse is the length of the handle and its orientation on the bag – it feels very comfortable slung over my shoulder!

What’s next?

Well, I’m going to be making a second Presidio Purse (pre-shrinking fabric as I type), but I’m going to experiment with scaling the size down a little as this bag a lot larger than I am used to using regularly. Plus I have a few “embellishment” ideas percolating.

The shape of this bag just beckons playing around with design elements like color blocking, jeans recycling, embroidery, fabric stamping, pleating, tucks…

Is there a Presidio Purse in your future?

Happy Fall Y’All!

Today was such a beautiful day here in southern New England- a cloudless blue sky, shirt sleeve weather and the trees pretty close to “peak color”. It was the perfect day to bring a couple of my “friends” outside for a photo shoot!

Scrabble Jack

Meet Scrabble Jack from Happy Hollow Designs. His usual place of honor is in the front entrance to our home, but he agreed that today was just the perfect day for soaking up some warm rays of sunshine!

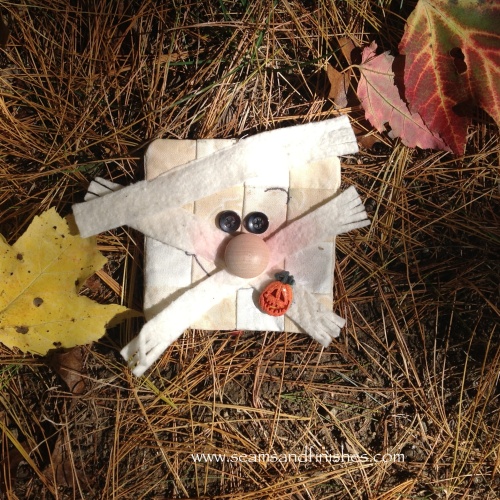
Not wanting to miss out on the field trip outside, My Mummy begged to tag along too!

My Mummy

Mummy

Scrabble Jack is made using a fusible grid fabric and your own choice of fabrics. I purchased some fat quarters and cut them just shy of 2″ square and fused them to the grid, as directed. Once all of your pieces are fused, you sew the rows in 1/4 ” seams! I tried to duplicate the colors and shading of the original, and am very happy with the result. In addition, I purchased the accessory kit which included the raffia, buttons and scrabble tiles to make Jack come to life.

The Mummy comes in an Espresso coffee cup with all the parts necessary to complete him. There are several other cute Espresso designs on the website Including some Christmas kits. I'm thinking cute ideas for a holiday swap.

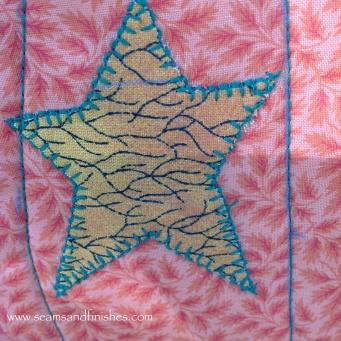
Next up is my pumpkin table runner. My quilting experience does not extend much beyond what I show here. This is done completely by machine, including the blanket stitching around the star applique.

Pumpkins

Pumpkins

Applique

Applique

Now that the sun has set (a beautiful pink and orange sky) my friends have returned to their customary posts in the house, very important, and very festive!


Are You Ready for Soccer?

I have a special birthday party to attend next week. The Birthday Boy, born on 9/9/09, will proudly tell you that “I’m growing-up. I’m going to be four”

Well, I don’t know where those four years have gone, but I’ve had a collection of embroidery designs for longer than that begging to be used…

Twist.my.arm.

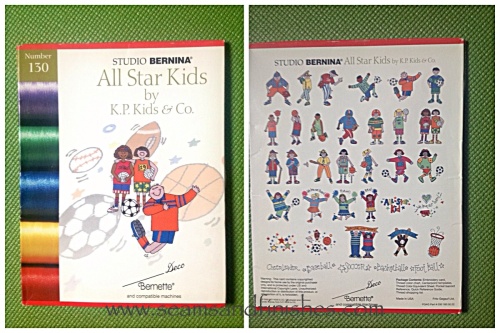
I hunted for these on Ebay after seeing a sweater using several of the designs in Sew News. I was lucky to have found the collection, as it is no longer available from a dealer.

Getting to work!

  • I purchased a Lands’ End scherpa-lined hoodie
  • changed the hair color in the design from black to “blonde”
  • reduced the design density from 11,000 stitches to 9000.

Changing the hair color required “zooming-in” on the design and viewing a simulation of the stitch-out on the computer. As I watched the player, I was able to insert a new color, and then resume the black thread color. Getting the stops in the right place is important, so that a yellow outline on the soccer player and a yellow soccer ball can be avoided!

Hooping the hoodie:

As I mentioned, this sweatshirt has a hood, and a scherpa lining. Ideally sweatshirts should be “hooped”, but because of the sleeve, hood and bulkiness of this project I did the following:

  • affixed a cutaway mesh stabilizer to the inside of the sweatshirt (scherpa) using a spray adhesive
  • hooped a washaway sticky stabilizer, scored it and peeled the topping away to expose the “sticky”
  • taped my printed design template to the hoodie and centered it in the hoop

Cutaway stabilizers are recommended for embroidering on knits so that the stitches don’t wobble and distort during the stitching and the design is well-supported on the garment.

At the Machine:

Attach the hoop and “fine-tune” so the needle penetrates at the center of the design. Baste around the design, if your machine does this, so that the garment & stabilizer are attached.  I recorded the coordinates of the center after adjusting, just in case. I’m living dangerously and did not do a test stitch-out…

Some people leave their machines to embroider by themselves, unsupervised.

Some people use baby monitors to listen for problems in “Embroideryland.”

I am not in either of those camps. I watch like a hawk. I hold my breath (sometimes, like today) so that I can hear the clunking of a bird’s nest in-the-making, or watch the innocent needle falling out from the vibration, or having to re-thread after a thread break. All of these things happened today.

After tending to these hiccups, I came close to needing the initially recorded coordinates having found it necessary to remove the hoop from the machine while performing minor surgery (during the final color block, of course!)

Ninety minutes after sitting at the machine, we have success.

  • trim jump stitches
  • trim stabilizer
  • press & admire

Ayden will be ready for soccer.

Laptop Satchel

One of my favorite machine embroidery designers is Kara Sutton of Kreations by Kara.

Occasionally, I find myself wandering over to her site …(ok, maybe more often than occasionally).

Anyway, while I was there one time, the most beautiful collection of Dandelions just jumped into my shopping cart! Amazing. It all happened so quickly!

Deciding on a suitable project to showcase these designs took much longer…

Laptop Satchel#1

I found the perfect canvas for my embroidery with this Laptop Satchel pattern from Vanilla House designs.

The satchel interior features a divided pocket and an additional zippered pocket for holding keys, phone, pens etc., alongside your computer and other documents. It makes a great gift too.

I had so much fun making one, that I had to make another!

Laptop Satchel #2

The first one I donated to a silent auction family benefit. It's always a good feeling being able to turn your hobby into something to help others.

The second satchel was my daughter's choice.

Lets see, now…I have a “few” more designs from Kreations by Kara, but I do not yet have one of these satchels. Hmm, I wonder what I can do about that??